Welcome to TechNET’s online timesheet portal whereby you can approve and reject timesheets processed by the designated contractors. The system is straightforward to use, but please consult the guide below for instructions.
Accessing the System
The first step is to open your web browser and head to – https://technetitrecruitment.timesheetportal.com/
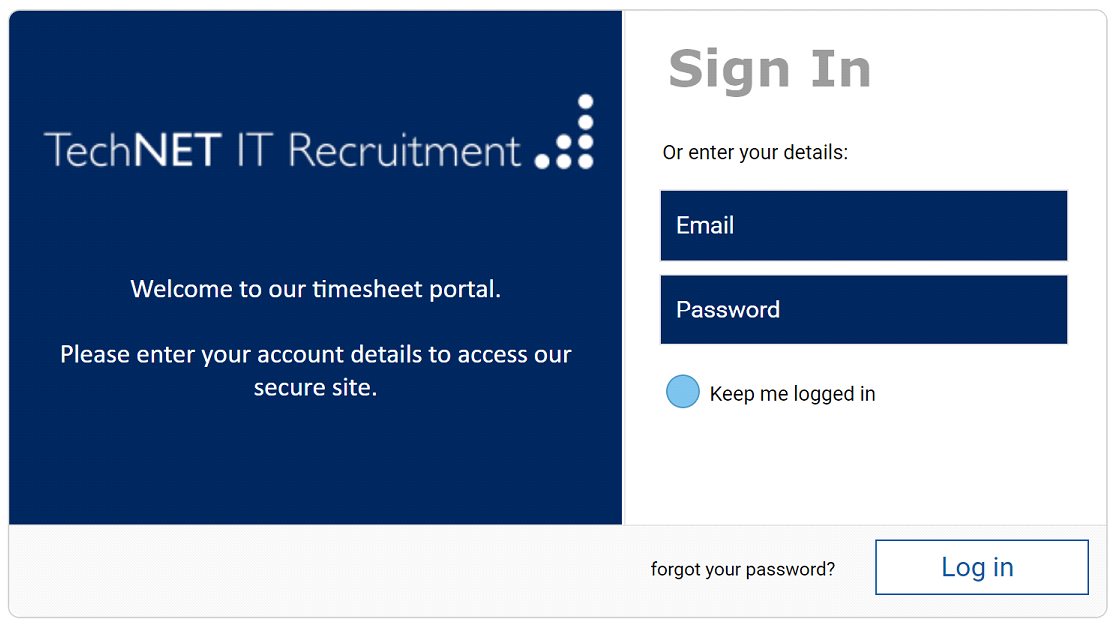
You will be prompted for your Username and Password, which should have been provided via email. If this isn’t the case then please contact your recruiting consultant at TechNET or send an email to [email protected]
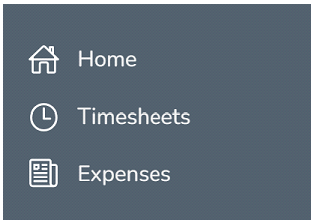
Once you have logged in you will be taken straight to the timesheets in need of your attention for sign off. You will also have access to the main navigation menu located on the left side of the screen.
Your Profile
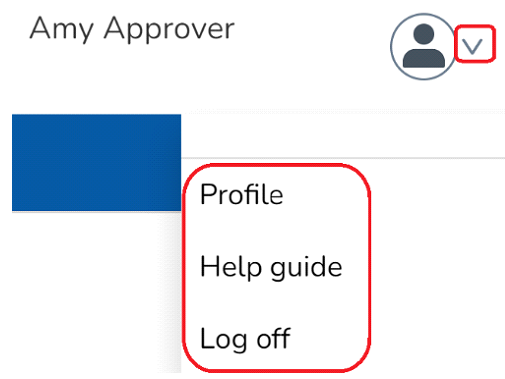
Located in the top right corner of the screen, the Profile menu provides access to your user profile where you can update your contact details and change your system preferences. Within this area you can also access a built in help guide, and log out of the portal.
Timesheet Basics
There are several different states of timesheet that you should be aware of –
Draft: A draft timesheet is one that a worker has created and saved but not yet submitted.
Submitted: A submitted timesheet is one that a worker has created and submitted for your approval. Submitted timesheets cannot be modified by the worker once they have been submitted.
Approved: An approved timesheet is a submitted timesheet that has been approved by yourself for payment.
Rejected: A rejected timesheet is a submission that has been rejected by yourself, likely due to the incorrect time being recorded. You can provide a comment as to why the timesheet was rejected. Once rejected, the timesheet becomes a draft for editing and resubmitting by the worker. Upon rejection the worker will be notified via email and through their own view of the Timesheet portal.
Approving or Rejecting Timesheets
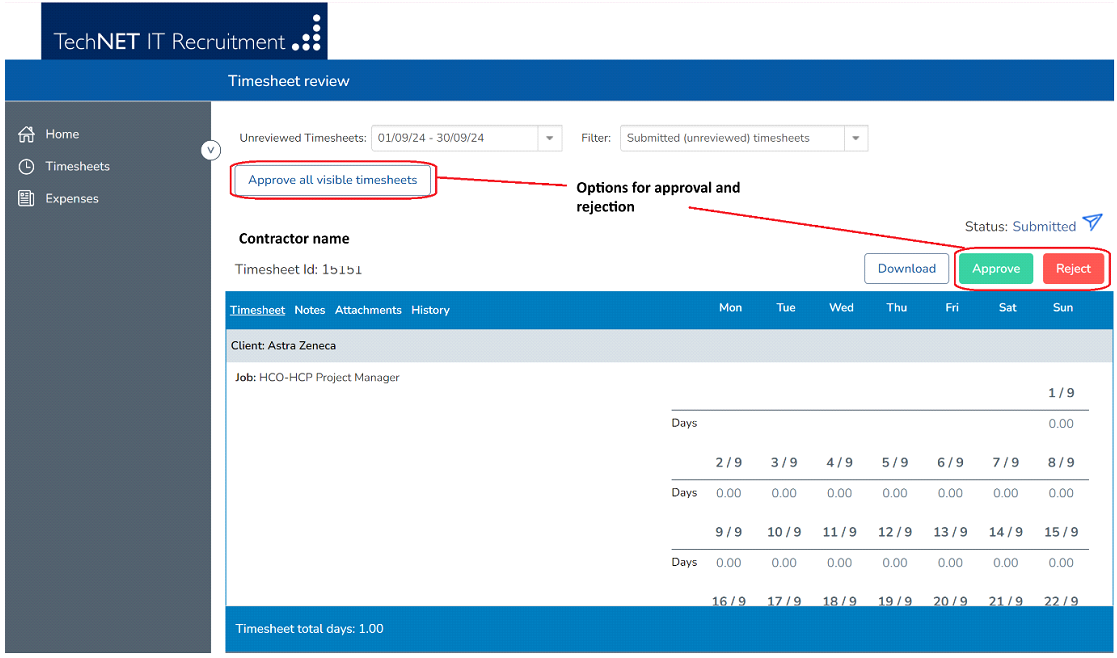
Upon logging into the Timesheet portal account you will be taken to the timesheets in need of your attention. All timesheets applicable to same weekly or monthly period will be displayed on the same page, allowing you to approve or reject each. Alternatively, you can select the option at the top of the view to ‘Approve all visible timesheets for quick bulk approval.
The option to approve timesheet via an automated email sent to you at the point of worker submission is also possible. If you would like this feature to be activated please contact [email protected].
Viewing previous Timesheets
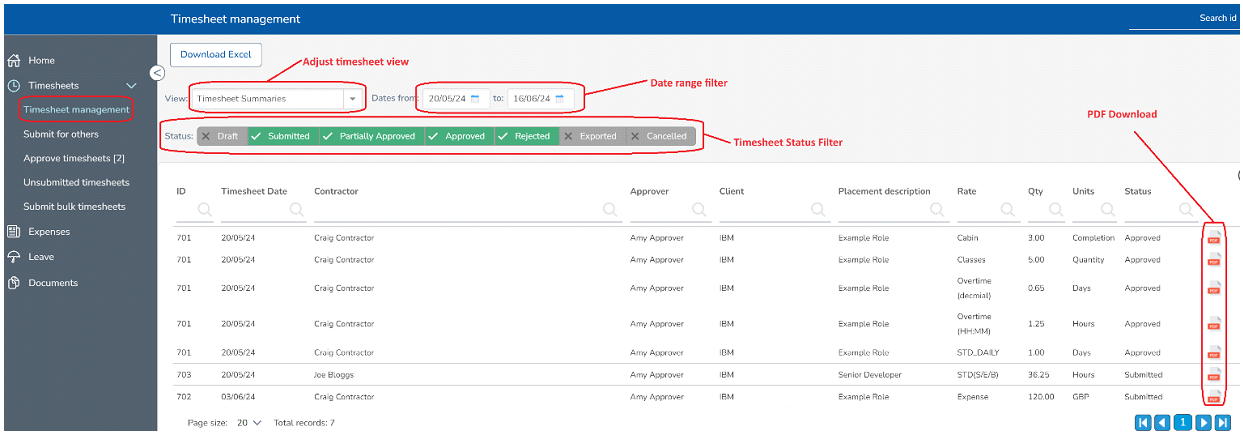
Any timesheets sent to you for approval, those you have previously approved or any you have rejected can be viewed at any point via the ‘Timesheet Management’ section, located in the main menu to the left of the screen within ‘Timesheets’.
The date range picker and timesheet status filter will help you to find specific timesheets. You can also use the fields at the top of the columns to search for specific contractor names.
To view an individual timesheet, simply click on the timesheet row. To create a downloadable PDF timesheet, similar to the on-screen version, click on the PDF icon on the right hand side of the page.
The number that appears next to the Draft menu item (in brackets) is the number of Draft timesheets you currently have.
Simply select the draft timesheet you wish to modify (or submit) by clicking on the name of the timesheet. You will then be taken to the timesheet form described in the “Entering Your Timesheet” section. Please refer to these instructions to edit and submit your draft timesheet.
Expense Basics
As with the timesheets, expenses can be in the following states:
Draft: A draft expense is one that a worker has created and saved but not yet submitted.
Submitted: A submitted expense is one that a worker has created and submitted for your approval. Submitted expense cannot be modified by the worker once they have been submitted.
Approved: An approved expense is a submitted timesheet that has been approved by yourself for payment.
Rejected: A rejected expense is a submission that has been rejected by yourself. You can provide a comment as to why the expense was rejected. Once rejected, the expense becomes a draft for editing and resubmitting by the worker. Upon rejection the worker will be notified via email and through their own view of the Timesheet portal.
Approving or Rejecting Expenses
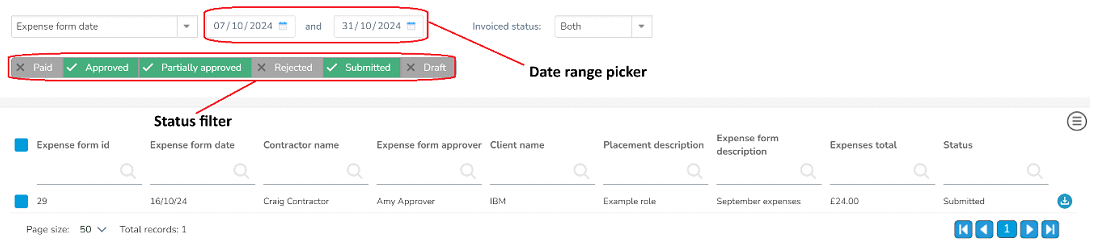
By clicking on ‘Expenses’ in the main menu to the left of the screen you will be taken to the expenses in need of your attention. All expenses applicable to date range selected will be displayed, allowing you to approve or reject each.
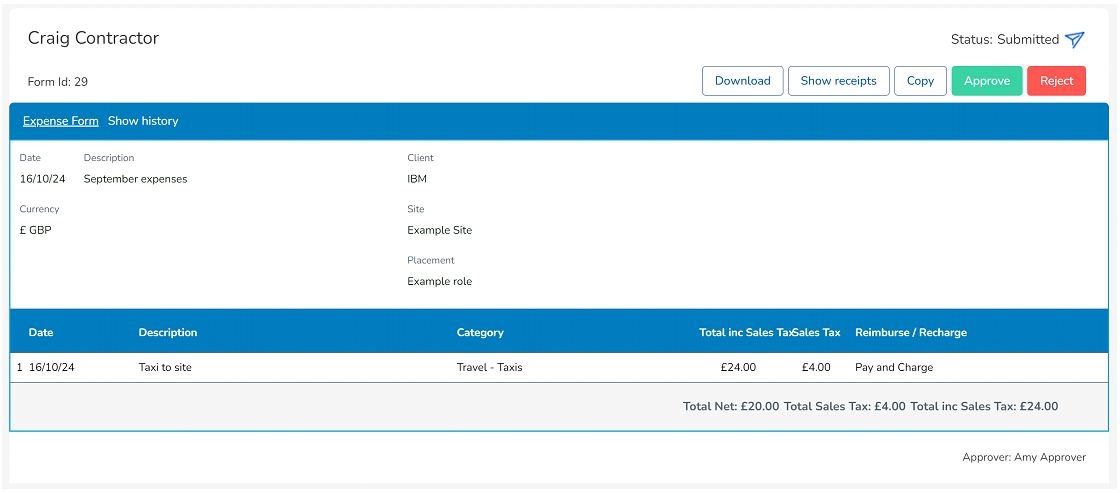
Simply click on the expense row to open the expense and select the option to either approve or reject the submission. Clicking ‘Show Receipts’ will display any associated receipts at the foot of the expense form.
The option to approve expenses via an automated email sent to you at the point of worker submission is also possible. If you would like this feature to be activated please contact [email protected].
Approving or Rejecting Expenses
Any expenses sent to you for approval, those you have previously approved or any you have rejected can be viewed at any point via the ‘Expenses’ page. Specific expense forms can be found through adjusting the date range filter, status and/or searching for specific workers by name.
For any enquires around the Timesheet Portal software please reach out to that team directly.